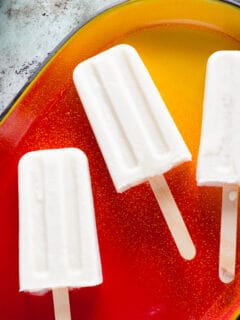
One of the purest summer pleasures is sitting outside on a hot day with a popsicle in hand while you race to consume the icy treat before your fingers are covered in sticky melted drips. These coconut lime popsicles are pretty much everything I want in a popsicle for that fleeting moment of joy. They’re …
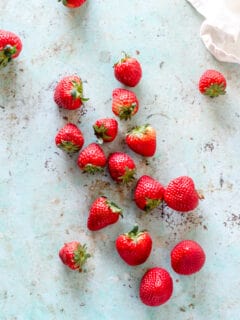
If you’re looking for inspiration for using strawberries, here is a collection of some of my favorite strawberries recipes. If you have the chance to buy fresh, local strawberries, those are usually your best bet for berries with the best flavor. And if you have strawberries in your garden, lucky you! But the strawberries I …
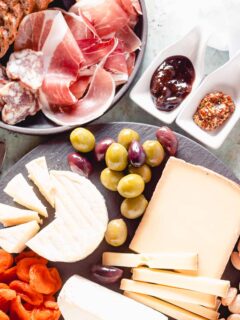
So you want to put together a cheese board? Great! It’s the kind of cooking that’s really more about shopping than anything else, which means that you don’t need to have particular skill in the kitchen to serve at your next gathering. But shopping for cheese can be intimidating. Especially if you, like most people, …
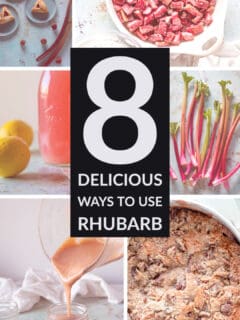
Rhubarb is remarkably versatile. We tend to treat it like a fruit, but botanically, it’s a vegetable. The leaves have a reputation for being toxic because of their oxalic acid, which can interfere with the essential minerals like iron, magnesium, and calcium. But spinach has more oxalic acid than rhubarb leaves do, and it’s still …
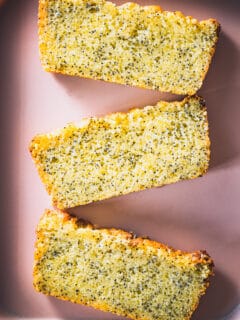
There’s a special place in my heart for loaf cakes. They’re unfussy and unassuming. They don’t demand layers and decoration and all of the foofaraw that can go along with a serious baking project. They don’t demand a special occasion. They’re suitable for dessert, portable for picnics, and a great excuse for sweet snacking. If …
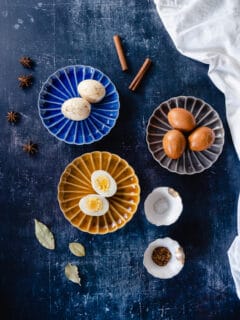
These marbled Chinese tea eggs are lovely to look at and delicious to eat. In China, these tea eggs are typically sold by street vendors and are a popular snack. But regardless of where you live, if you have access to a few spices and soy sauce and tea, they’re incredibly easy to make. The …